

Understanding Oil Furnaces
Oil furnaces are heating systems that burn fuel oil to generate warmth for homes and buildings. These systems have been used for decades and remain popular in areas without access to natural gas lines.
Components and Functions
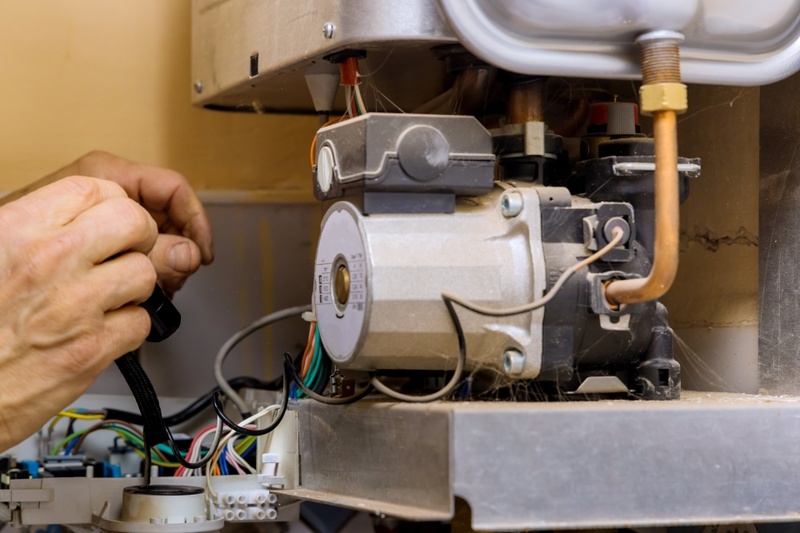
Oil furnaces consist of several key parts working together to produce and distribute heat. The oil tank stores fuel, while the fuel pump transfers oil to the burner. The burner atomizes and ignites the oil, creating a flame inside the combustion chamber.
A heat exchanger absorbs the heat from combustion and transfers it to the air. The blower fan circulates this warm air through ductwork. The thermostat controls the system, signaling when heat is needed.
Filters remove particles from the air, improving indoor air quality. The flue pipe expels combustion gases safely outside the building.
Types of Oil Furnaces
There are two main types of oil furnaces: forced air and hot water boilers.
Forced air systems heat air directly and distribute it through ducts. These are common in residential settings and provide quick heating.
Hot water boilers heat water, which is then circulated through radiators or radiant floor systems. This type offers more even heat distribution but takes longer to warm up.
High-efficiency condensing oil furnaces are also available. These extract additional heat from exhaust gases, achieving efficiency ratings up to 95%.
Basic Operational Principles
Oil furnaces operate on a simple cycle. When the thermostat detects the temperature has fallen below the set point, it signals the furnace to start.
Don’t Overpay for HVAC Services – Call 888-894-0154 Now to Compare Local Quotes!
The fuel pump activates, sending oil to the burner. The burner ignites the oil, creating a flame in the combustion chamber. As the heat exchanger warms up, the blower fan turns on, circulating heated air through the home.
Once the desired temperature is reached, the thermostat signals the furnace to shut off. This cycle repeats as needed to maintain a consistent temperature.
Regular maintenance, including oil filter changes and burner adjustments, ensures efficient operation and longevity of the system.
Common Oil Furnace Problems
Oil furnaces can experience several issues that affect their performance and efficiency. These problems range from heating inadequacies to unusual noises and burner malfunctions.
No Heat or Insufficient Heat
Oil furnaces may fail to produce heat or provide inadequate warmth. This can result from a variety of causes. A clogged oil filter can restrict fuel flow, leading to insufficient heating. Dirty or faulty ignition electrodes may prevent the burner from lighting properly.
Thermostat issues can also cause heating problems. A malfunctioning thermostat might not accurately sense room temperature or communicate with the furnace. Checking and calibrating the thermostat can often resolve this issue.
Low oil levels in the tank can prevent the furnace from operating. Regular monitoring of fuel levels is essential to avoid unexpected heating loss.
Frequent Cycling or Over-Cycling
Furnaces that turn on and off too frequently waste energy and increase wear on components. This problem, known as short cycling, can have several causes.
A clogged air filter is a common culprit. It restricts airflow, causing the furnace to overheat and shut down prematurely. Changing or cleaning the filter regularly can prevent this issue.
Improper thermostat settings or placement can lead to frequent cycling. Ensure the thermostat is not near heat sources or drafts that could affect its readings.
Oversized furnaces may also short cycle. They heat spaces too quickly, causing frequent shutoffs. A professional evaluation can determine if the furnace is properly sized for the home.
Unusual Noises
Strange sounds from an oil furnace often indicate mechanical problems. Rumbling noises might suggest delayed ignition or a dirty burner. This can be dangerous and requires immediate attention.
Whistling or squealing sounds often point to belt or blower motor issues. Loose or worn belts may need tightening or replacement. Blower motors might require lubrication or repair.
Banging or popping noises when the furnace starts or stops could indicate expansion and contraction of ductwork. While not always serious, these noises can be reduced by proper duct installation and insulation.
Oil Burner Malfunctions
Oil burner problems can significantly impact furnace performance. Soot buildup on the burner can reduce efficiency and cause incomplete combustion. Regular cleaning and maintenance can prevent this issue.
Faulty nozzles can lead to improper fuel spray patterns, affecting combustion quality. Replacing worn or damaged nozzles ensures optimal fuel delivery and burning.
Air leaks in the combustion chamber can disrupt the proper fuel-air mixture. This can lead to inefficient burning and increased fuel consumption. Sealing any gaps or cracks in the chamber is crucial for proper operation.
Fuel pump issues can cause inconsistent oil delivery to the burner. This may result in intermittent heating or complete furnace failure. Regular inspection and maintenance of the fuel pump can prevent these problems.
Safe Troubleshooting Practices
Don’t Overpay for HVAC Services – Call 888-894-0154 Now to Compare Local Quotes!
Proper safety measures and preparation are crucial when troubleshooting an oil furnace. Following guidelines, using the right tools, and understanding system warnings can prevent accidents and ensure effective problem-solving.
Preparation and Safety Guidelines
Turn off the power supply to the furnace before starting any work. Locate the emergency shut-off switch, typically near the furnace or at the top of basement stairs. Allow the furnace to cool completely before touching any components.
Wear appropriate personal protective equipment (PPE). This includes safety glasses, work gloves, and a dust mask. Ensure proper ventilation in the work area to prevent inhaling fumes or dust.
Keep a fire extinguisher nearby as a precaution. Familiarize yourself with the furnace manual and follow manufacturer-specific safety instructions.
Tools and Equipment Needed
Essential tools for oil furnace troubleshooting include:
- Multimeter for electrical testing
- Combustion analyzer to check exhaust gases
- Pressure gauge to measure oil pump pressure
- Infrared thermometer for temperature checks
- Screwdrivers and wrenches for component access
Specialized equipment may be necessary for certain tasks:
- Nozzle changing tools
- Oil filter wrench
- Fuel pump vacuum gauge
Keep tools clean and in good condition. Replace damaged tools to prevent accidents or inaccurate readings.
Understanding System Warnings
Pay attention to warning lights or error codes on the furnace control panel. Refer to the user manual to interpret these signals accurately. Common warnings include:
- Red flashing light: Indicates a system lockout
- Yellow steady light: Signifies a call for heat
- Green blinking light: Shows normal operation
Listen for unusual noises during operation. Banging, whistling, or rumbling sounds may indicate specific issues. Observe flame color through the inspection window. A yellow or orange flame suggests incomplete combustion.
Monitor your home’s carbon monoxide detectors. If they activate, immediately shut off the furnace and evacuate the premises. Regular maintenance helps prevent many warning situations from occurring.
Systematic Diagnostic Procedures
Troubleshooting an oil furnace requires a methodical approach to identify and resolve issues effectively. Following a step-by-step process helps pinpoint problems accurately and efficiently.
Thermostat Assessment
Begin by examining the thermostat settings. Ensure it’s set to “heat” mode and the temperature is higher than the current room temperature. Replace batteries if necessary. Check for loose wires or signs of damage.
Test the thermostat by raising the temperature setting significantly. Listen for the furnace to kick on. If it doesn’t respond, use a multimeter to verify proper voltage output from the thermostat to the furnace.
Consider upgrading to a programmable thermostat for improved efficiency and temperature control.
Oil Tank and Fuel Supply Inspection
Check the oil tank’s fuel level using a dipstick or gauge. Low fuel can cause furnace malfunctions. Inspect the tank for leaks, rust, or damage.
Don’t Overpay for HVAC Services – Call 888-894-0154 Now to Compare Local Quotes!
Examine the fuel lines for kinks, leaks, or blockages. Ensure the oil filter is clean and properly installed. Replace it if clogged or damaged.
Verify that the shutoff valve is open. Bleed air from the fuel lines if necessary. This process may require professional assistance to avoid oil spills.
Ignition System Analysis
Inspect the ignition electrodes for proper positioning and cleanliness. Clean or adjust as needed. Check for cracks or damage in the porcelain insulators.
Examine the ignition transformer for signs of damage or wear. Test its output voltage with a multimeter. Replace if it fails to produce the required voltage.
Inspect the nozzle for clogs or wear. Clean or replace as necessary. Ensure proper nozzle size and spray pattern for optimal fuel atomization.
Blower Motor and Belt Review
Listen for unusual noises when the blower operates. Check the motor for overheating or burning smells. Lubricate bearings if required.
Inspect the blower belt for proper tension and signs of wear. Replace if cracked, frayed, or loose. Adjust tension if necessary.
Clean the blower assembly to remove dust and debris. This improves airflow and efficiency. Check the capacitor for signs of bulging or leakage. Replace if faulty.
Maintenance Strategies
Regular maintenance is crucial for keeping an oil furnace running efficiently and preventing costly breakdowns. Implementing a comprehensive upkeep plan ensures optimal performance and extends the lifespan of the heating system.
Routine Cleaning and Upkeep
Dust and debris accumulation can significantly impact furnace efficiency. Clean the exterior of the furnace monthly using a soft brush or vacuum. Wipe down accessible components with a damp cloth to remove grime.
Inspect the combustion chamber annually for signs of wear or damage. Clean it carefully using a wire brush and vacuum to remove soot buildup. This improves heat transfer and fuel efficiency.
Check and tighten electrical connections yearly. Loose wires can cause system failures or safety hazards. Lubricate moving parts like motors and bearings according to manufacturer recommendations to reduce friction and wear.
Filter Replacement and Oil Quality
Replace or clean the air filter every 1-3 months, depending on usage and environmental factors. A clogged filter restricts airflow, reducing efficiency and potentially damaging the system.
| Filter Type | Replacement Frequency |
|---|---|
| Disposable | Every 1-3 months |
| Washable | Clean monthly |
Monitor oil quality regularly. Check for signs of contamination, such as water or debris in the tank. Use a dipstick to measure oil levels and schedule refills before the tank runs low.
Consider an annual oil analysis to detect potential issues early. This test can identify contaminants, degradation, and wear particles in the oil.
Seasonal Maintenance Checklist
Before the heating season:
- Test the thermostat for accurate temperature control
- Inspect the chimney and flue for blockages or damage
- Check the blower belt for proper tension and wear
- Clean the blower assembly and fan blades
After the heating season:
- Perform a professional inspection and tune-up
- Clean the nozzle and electrodes
- Adjust the burner for optimal fuel-air mixture
- Test safety controls and limit switches
Schedule professional maintenance annually to address complex issues and ensure peak performance. Technicians can perform advanced diagnostics and make necessary adjustments to keep the furnace running safely and efficiently.
Troubleshooting Specific Parts
Oil furnace issues often stem from malfunctioning components. Identifying and addressing problems with key parts can restore efficient operation and prevent costly breakdowns.
Burner Nozzle and Electrodes
Inspect the burner nozzle for clogs or damage. A clogged nozzle can cause poor fuel atomization, leading to incomplete combustion and reduced efficiency. Clean or replace the nozzle as needed.
Check electrode positioning and condition. Proper gap and alignment are crucial for reliable ignition. Adjust or replace electrodes if they’re worn or misaligned.
Ensure the nozzle and electrodes are free from carbon buildup. Clean them gently with a wire brush or replace if severely fouled.
Test the ignition system by observing the spark during startup. If there’s no spark, check the ignition transformer and wiring connections.
Heat Exchanger and Flue Pipe
Inspect the heat exchanger for cracks or corrosion. These can lead to dangerous exhaust gas leaks and reduced efficiency. Use a flashlight to examine the interior surfaces.
Check for soot buildup in the heat exchanger and flue pipe. Excessive soot indicates incomplete combustion and reduces heat transfer. Clean thoroughly if necessary.
Ensure the flue pipe is properly connected and free from obstructions. Look for signs of rust, holes, or loose joints. Repair or replace damaged sections to prevent exhaust leaks.
Verify proper draft in the flue pipe using a draft gauge. Insufficient draft can cause poor combustion and safety issues.
Transformers and Control Box
Test the ignition transformer output voltage. Low voltage can cause weak sparks and ignition failures. Replace the transformer if it’s not producing adequate voltage.
Check control box wiring connections for loose or corroded terminals. Tighten connections and clean corroded areas to ensure proper electrical flow.
Inspect fuses and circuit breakers in the control box. Replace any blown fuses or reset tripped breakers. Persistent issues may indicate an underlying electrical problem.
Verify thermostat function by testing continuity and proper temperature settings. Replace the thermostat if it’s malfunctioning or inaccurate.
Pump and Pressure Issues
Check oil pump pressure using a gauge. Adjust if it’s outside the manufacturer’s specified range. Low pressure can cause poor combustion and nozzle dripping.
Inspect oil lines for leaks or air infiltration. Tighten fittings and replace damaged lines to maintain proper fuel flow and pressure.
Clean or replace the oil filter if clogged. A restricted filter can reduce fuel flow and cause pressure drops.
Bleed air from the pump and lines if the furnace has been out of fuel. Air in the system can prevent proper oil flow and cause ignition failures.
Verify that the pump coupling is intact and properly aligned. A damaged or misaligned coupling can cause pump failures and pressure issues.
Advanced Solutions
Tackling complex oil furnace issues requires specialized knowledge and techniques. These methods can restore optimal performance and extend equipment lifespan.
Electrical and Control Circuit Repairs
Faulty electrical components often cause oil furnace malfunctions. Technicians should check for loose connections, corroded wires, and damaged circuit boards. Replacing worn contactors and relays can resolve intermittent heating issues.
Testing the cad cell with a multimeter helps identify sensor failures. If readings are outside normal ranges, replacing the cad cell may fix flame sensing problems.
Inspecting and cleaning the electrodes ensures proper spark generation for ignition. Adjusting the electrode gap to manufacturer specifications improves start-up reliability.
Combustion Efficiency Adjustments
Fine-tuning the air-to-fuel ratio maximizes combustion efficiency. Technicians use combustion analyzers to measure CO2, O2, and stack temperature.
Adjusting the air shutter and fuel pressure helps achieve optimal readings. Typical targets include 11-13% CO2 and 2-4% O2.
Cleaning or replacing the oil nozzle improves fuel atomization. Selecting the correct nozzle size and spray pattern for the specific furnace model is crucial.
Proper draft control prevents heat loss and improves efficiency. Technicians should check and adjust the barometric damper to maintain -0.02 to -0.04 inches of water column.
Lubrication and Motor Replacements
Regular lubrication extends motor and blower lifespans. Technicians should oil bearings annually, using manufacturer-recommended lubricants.
Replacing worn motors prevents system failures. Signs of motor issues include unusual noises, excessive heat, and slow startup.
When replacing blower motors, matching the horsepower, speed, and rotation direction is essential. Installing a correctly sized capacitor ensures proper motor operation.
Inspecting and cleaning the blower wheel improves airflow. Technicians should check for debris buildup and bent blades, replacing the wheel if necessary.
Upgrading Thermostat Compatibility
Modern programmable and smart thermostats offer improved comfort and energy savings. Technicians must ensure compatibility with older oil furnace systems.
Installing an adapter may be necessary to connect newer low-voltage thermostats to line-voltage systems. This conversion allows for more precise temperature control.
Proper wiring is crucial when upgrading thermostats. Technicians should carefully label and connect the appropriate terminals, including R, W, G, and C wires.
Some smart thermostats require a C-wire for constant power. If absent, installing a C-wire adapter or power extender kit solves this issue.
Professional Support and Services
Professional assistance is crucial for complex oil furnace issues and routine maintenance. Experts can diagnose problems accurately, perform repairs safely, and ensure optimal system performance.
When to Call a Professional
Oil furnace professionals should be contacted for annual maintenance, safety inspections, and when issues arise beyond basic troubleshooting. Call an expert if you notice unusual noises, persistent odors, or frequent cycling.
Seek professional help for electrical problems, fuel line issues, or if your furnace fails to start. Technicians have specialized tools and knowledge to address complex problems safely and efficiently.
Don’t attempt to repair or replace major components yourself. Professional intervention is necessary for burner adjustments, heat exchanger inspections, and fuel pump replacements.
Warranty and Service Contracts
Many oil furnace manufacturers offer warranties covering parts and labor for a specified period. Review your warranty terms to understand coverage limits and requirements.
Service contracts provide regular maintenance and priority service. These agreements often include annual tune-ups, discounted repairs, and emergency response.
Consider factors like contract duration, covered services, and cost when choosing a service plan. Some contracts offer additional benefits such as fuel delivery or price protection.
Finding Qualified Oil Furnace Technicians
Finding the right furnace repair expert can be tricky—some companies offer rock-bottom prices because they’re inexperienced or have poor reputations, while others charge far too much for the same work. That’s why the smartest way to get quality repairs at a fair price is to compare estimates from top-rated local pros. Meet with each, learn about their history and the experience of the technicians that will do the work. Choose an experienced furnace repair contractor with reasonable rates. You can expedite this process by using our Free Local Estimates service.
When you fill out a quick form and submit it, you’ll soon be contacted by three of the top furnace repair and installation companies near you. They are prescreened for experience, and all are licensed and insured for your protection. Click below to get started and protect your home and wallet today.
Energy Efficiency and Optimization
Optimizing an oil furnace’s energy efficiency can lead to significant cost savings and improved performance. Proper tuning, insulation upgrades, and smart controls are key areas to focus on.
Tuning for Best Performance
Regular maintenance and tuning are essential for peak oil furnace efficiency. Annual professional inspections can identify and correct issues that reduce performance. Technicians adjust the fuel-to-air ratio to ensure optimal combustion, minimizing wasted fuel.
Cleaning or replacing filters improves airflow, reducing strain on the system. Lubricating moving parts reduces friction and energy consumption. Checking and calibrating the thermostat ensures accurate temperature control.
Burner nozzle inspection and replacement when necessary improves fuel atomization, leading to more complete combustion and higher efficiency.
Insulation and Ductwork Improvements
Proper insulation and sealed ductwork maximize the furnace’s heating effectiveness. Insulating attics, walls, and floors reduces heat loss, allowing the furnace to work less.
Sealing and insulating ductwork prevents heated air from escaping

How to Get the Best HVAC Prices
- Firstly, keep in mind that installation quality is always the most important thing for residential HVAC project. So never sacrifice contractor quality for a lower price.
- Secondly, remember to look up the latest rebates as we talked above.
- Thirdly, ask for at least 3 bids before you make the decision. You can click here to get 3 free estimates from your local contractors, and this estimate already takes rebates and tax credit into consideration and filter unqualified contractors automatically.
Lastly, once you chose the right contractor, remember to use the tactics from this guide: Homeowners Tactics When Negotiating with HVAC Dealer to get the final best price.