
")
Mini split systems have grown in popularity across the United States for their energy efficiency and ability to provide both heating and cooling. However, like any HVAC equipment, they can experience performance issues. One of the most common complaints is when a mini split is not heating properly. This article will explore the common causes of mini split heating problems and offer solutions on how to fix them. It also provides preventative measures and best practices to ensure long-term performance. All information is presented in a concise yet comprehensive way, with actionable steps that homeowners can follow.
Understanding How a Mini Split System Works

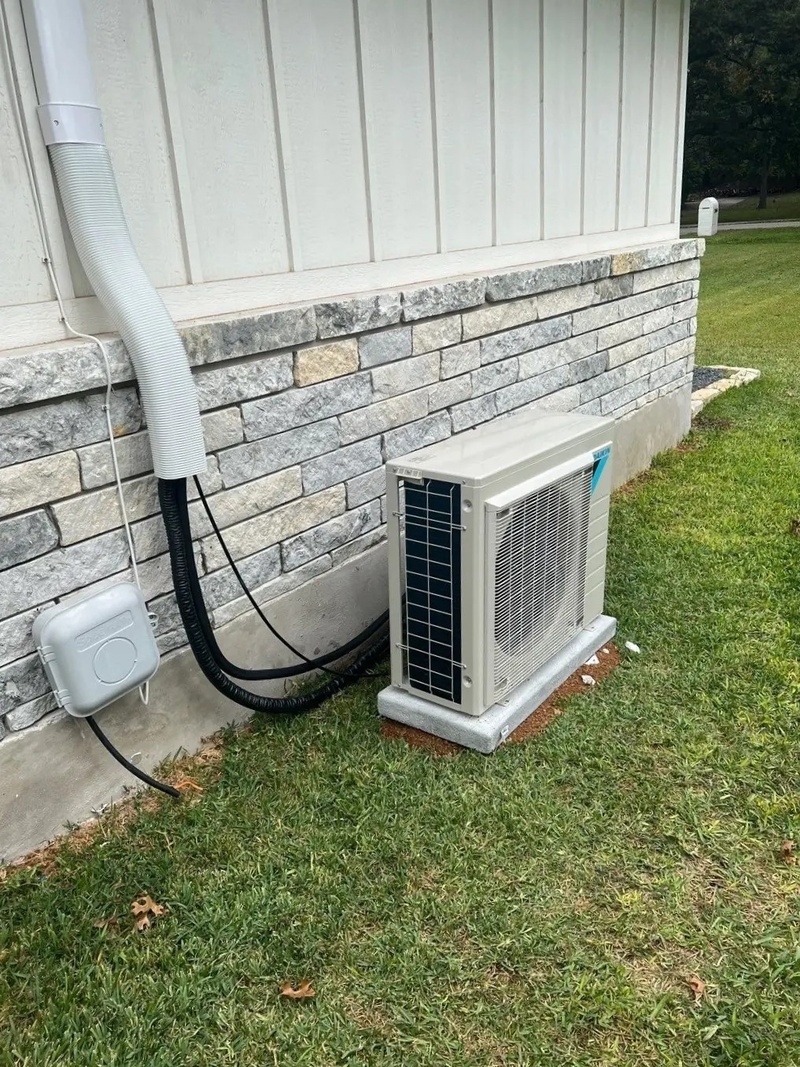
Mini split systems, often referred to as ductless mini splits, operate similarly to traditional heat pumps—but without the ductwork. Each indoor unit connects to an outdoor condenser through a conduit that houses the refrigerant lines, power cable, and a condensate drain line. These systems can both heat and cool by transferring heat in or out of the indoor environment through the refrigerant cycle.
When set to heating mode, the outdoor unit essentially pulls heat from outside air (even when it is cold) and transfers it indoors. This process relies on a reversing valve to change the flow of refrigerant, allowing the system to generate heat instead of cold air. Because of this reliance on air-source heat transfer, the efficiency of mini splits can be affected by very low outdoor temperatures, refrigerant levels, and other factors. Understanding these fundamentals can help diagnose why a mini split may not be producing adequate heat.
Common Causes of Mini Split Heating Issues
1. Incorrect Thermostat or Control Settings
One of the simplest explanations for a mini split not heating is incorrect thermostat or control settings. Mini splits often come with remote controls or wall-mounted consoles that let the user switch between heating and cooling modes.
Possible Reasons
- The system is still set to cooling instead of heating.
- The temperature setting is too low for the unit to turn on the heat.
- The fan mode might be set to “Fan Only,” causing air circulation without heat.
How to Fix
- Confirm that the mode is set to “Heat” or “Heating.”
- Increase the thermostat or remote control setpoint to a temperature higher than the current room temperature.
- Ensure there are no conflicting schedules or timers set on the controller.
2. Power Supply or Electrical Issues
A stable power supply is critical to the operation of a mini split. Any disruption, such as faulty wiring or a tripped circuit breaker, can prevent the system from delivering heat.
Possible Reasons
- Tripped circuit breaker or blown fuse.
- Loose or damaged wiring connections between the indoor and outdoor units.
- Issues with the outdoor disconnect switch.
How to Fix
- Check the home’s electrical panel to see if the circuit breaker for the mini split has tripped. Reset if necessary.
- Inspect or have an HVAC technician check wiring and connections for damage or corrosion.
- If an outdoor disconnect switch is in place, confirm it is in the “On” position.
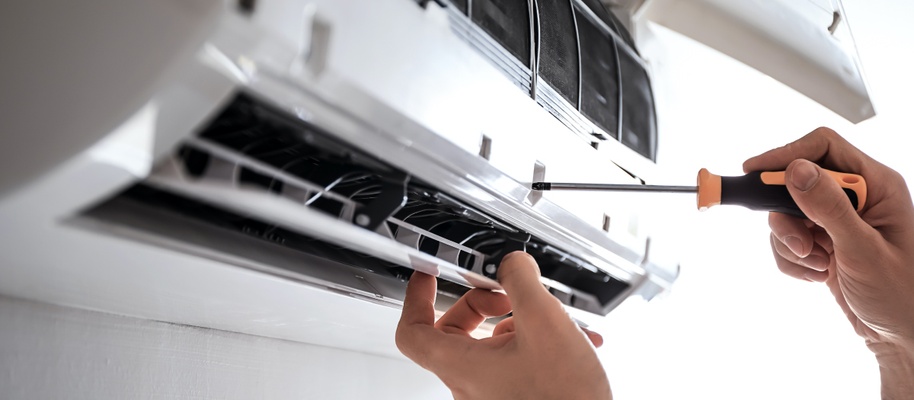
3. Clogged or Dirty Air Filters
Airflow is essential for a mini split to function effectively. If the system’s filters are clogged with dust and debris, airflow diminishes, causing reduced heating performance.
Don’t Overpay for HVAC Services – Call 888-894-0154 Now to Compare Local Quotes!
Possible Reasons
- Lack of regular cleaning or filter replacement.
- Operating the mini split in a dusty environment without frequent filter maintenance.
How to Fix
- Remove the indoor unit’s filters—most are easily accessible from the front panel—and clean them. Use warm water or a vacuum to remove dust.
- Allow filters to dry completely before reinstalling them.
- Set a maintenance schedule to clean or replace filters every one to three months, depending on usage and air quality.
4. Blocked or Obstructed Outdoor Unit
Just as airflow is essential indoors, the outdoor condenser needs ample space to pull in air from the environment. Debris such as leaves, snow, or ice can impede the unit’s airflow.
Possible Reasons
- Leaves, branches, or yard debris piled up around the outdoor condenser.
- Snow accumulation or ice formation during winter months.
- The outdoor unit is placed too close to walls or obstructions, limiting airflow.
How to Fix
- Clear any debris around the outdoor unit. Keep a two-to-three-foot clearance on all sides.
- In winter, regularly remove snow and ice buildup from around the unit.
- Avoid installing covers that restrict airflow; instead, use a specialized mini split condenser cover designed to allow proper ventilation.
5. Low Refrigerant Charge or Refrigerant Leaks
The refrigerant is the lifeblood of a mini split system, enabling heat transfer. A low refrigerant charge—often resulting from a leak—can severely limit the unit’s ability to generate heat.
Possible Reasons
- Factory undercharge, although less common, may result in insufficient refrigerant.
- Refrigerant leaks caused by loose fittings, damaged coils, or corrosion.
How to Fix
- Contact a certified HVAC technician to measure the refrigerant pressure. Only certified professionals can handle refrigerants safely and legally.
- If a leak is discovered, the technician will repair the leak source and recharge the system to the manufacturer’s specifications.
- Ensure regular annual checkups to detect small leaks before they become serious.
6. Malfunctioning Reversing Valve
A mini split’s reversing valve changes the flow direction of refrigerant to switch between heating and cooling modes. When this component malfunctions, the system may not produce heat.
Possible Reasons
- Mechanical failure or internal valve damage.
- Electrical or control signal problems preventing the valve from switching.
How to Fix
- Have a professional HVAC technician perform a diagnostic check. A reversing valve issue often requires specialized tools to confirm the problem.
- If the reversing valve is defective, it typically needs replacement—a task best left to professionals.
7. Defrost Cycle or Outdoor Unit Icing
During colder months, it is common for the outdoor unit to frost or ice up. Mini splits have an automatic defrost cycle to melt accumulated ice, but if this cycle fails or runs too frequently, it can impact heating performance.
Possible Reasons
- Defrost control board malfunction.
- Temperature sensors or thermistors are faulty, preventing the defrost cycle from activating.
- Excessive humidity, which can lead to excessive ice accumulation.
How to Fix
- Inspect the outdoor unit for signs of ice buildup. If there is ice, power off the system and safely remove ice if possible.
- If defrost cycle failure is suspected, a qualified technician can test the defrost control board and sensors.
- Avoid manually defrosting the unit with sharp tools that can damage the fins or coils.
8. Sensor or Thermistor Problems
Mini splits rely on various sensors (sometimes called thermistors) to monitor both indoor and outdoor temperatures. A faulty sensor can lead to inaccurate temperature readings, causing the unit not to heat appropriately.
Possible Reasons
- Damaged or disconnected sensor wire.
- Sensor calibration issues.
- A bad control board that fails to interpret sensor data correctly.
How to Fix
- Check for any visibly disconnected or damaged sensors near the indoor coil or outdoor unit.
- An HVAC technician can measure the sensor’s resistance and compare it to the manufacturer’s specifications.
- If the sensor or control board is defective, a professional should replace it.
9. Poor Insulation or Drafts
In some cases, a mini split might actually be producing enough heat, but the room does not retain it due to poor insulation or air leaks. The system runs continuously but cannot reach the desired temperature.
Possible Reasons
- Leaky windows, doors, or attic access points.
- Inadequate insulation in walls or ceilings.
How to Fix
Don’t Overpay for HVAC Services – Call 888-894-0154 Now to Compare Local Quotes!
- Seal doors and windows with weatherstripping or caulk to prevent cold drafts.
- Insulate walls and attics to improve heat retention.
- Consider an energy audit to identify specific areas where insulation can be improved.
Troubleshooting Mini Split Heating Problems: Step-by-Step
Below is a concise troubleshooting guide that homeowners can use as a first step when they notice their mini split is not heating. If any step seems beyond the homeowner’s comfort level or if the issue persists, a professional HVAC technician should be consulted.
- Check Power and Settings
- Ensure the mini split has power and is not in cooling or “Fan Only” mode.
- Confirm the thermostat is set higher than the current room temperature.
- Inspect Filters and Indoor Airflow
- Clean or replace the indoor unit’s air filters.
- Make sure vents and louvers are not blocked by furniture or curtains.
- Examine the Outdoor Unit
- Clear away debris, snow, or ice from around the condenser.
- Keep adequate clearance (at least two to three feet) on all sides.
- Assess for Low Refrigerant
- Listen for hissing or bubbling noises, which may indicate a leak.
- If there is suspicion of a leak, call a certified HVAC technician to perform a refrigerant check.
- Monitor the Defrost Cycle
- If the outdoor unit is heavily iced, temporarily shut off the system and safely remove visible ice.
- If the unit repeatedly ices over, schedule a professional inspection of the defrost control board and sensors.
- Evaluate Room Insulation
- Check for drafts around windows and doors.
- Add insulation where necessary to maintain heat in the space.
By following these steps, many homeowners can pinpoint minor issues. However, if the system still fails to generate heat, professional diagnosis is the safest and most effective solution.
Potential Costs for Repairs
While the cost of repairs varies depending on location, system model, and the nature of the issue, it can be helpful for homeowners to have a general idea of potential expenses. Below is a rough estimate table for common mini split heating repairs:
| Repair/Issue | Potential Cost Range (USD) | Comments |
|---|---|---|
| Simple filter cleaning | $0 – $50 | Homeowners can often handle themselves. |
| Thermostat/control settings fix | $0 – $150 | Could be a simple DIY or require a service call. |
| Electrical issues (breaker, wiring) | $100 – $300 | Costs can increase if wiring needs replacement. |
| Refrigerant leak detection & fix | $300 – $800+ | Depends on severity of leak and refrigerant type. |
| Reversing valve replacement | $600 – $1,000+ | Requires specialized parts and labor. |
| Sensor/thermistor replacement | $100 – $300 | Parts typically inexpensive, but labor adds cost. |
| Defrost control board repair | $200 – $500+ | Cost depends on part availability and complexity. |
These ranges are approximate and can differ significantly by region and brand. Always consult with a licensed HVAC technician for an accurate estimate.
When to Call a Professional
Though some homeowners can handle basic maintenance like cleaning filters or clearing debris, certain tasks require professional expertise. The following situations warrant calling a certified HVAC technician:
- Electrical or Wiring Problems
Working with electrical connections can be dangerous. A qualified technician can diagnose and safely repair electrical faults. - Refrigerant Handling
Refrigerants must be handled per EPA guidelines in the United States. Only licensed technicians should charge or recharge a system. - Complex Mechanical Failures
Issues like reversing valve malfunctions, compressor failure, or control board errors require specialized diagnostic tools and knowledge. - Extended Warranties and Insurance
Most manufacturer warranties or extended service contracts require authorized service from certified professionals to maintain coverage.
Consulting a professional not only ensures safety but also protects the investment in the mini split system.
Preventative Maintenance Tips
Regular maintenance is key to preventing heating issues with a mini split system. Some preventative steps include:
Use the System Within Its Optimal Temperature Range
Mini splits are designed to operate within specific outdoor temperature ranges. If outdoor temperatures are extremely low (e.g., below the unit’s rated temperature), consider supplementary heating to avoid straining the system.
Seasonal Inspections
Scheduling seasonal tune-ups can help detect potential problems like refrigerant leaks, electrical issues, or failing components before they escalate.
Regular Filter Cleaning
Clean filters every one to three months, depending on usage. This simple step can greatly improve both heating efficiency and indoor air quality.
Keep Outdoor Unit Clear
Ensure the condenser has enough space to draw air. During winter, clear snow and ice around the outdoor unit. During other seasons, remove leaves, branches, or other debris.
Check Insulation
Proper insulation reduces the workload on the mini split. Improving insulation not only saves energy but also keeps heating more consistent.
Monitor for Unusual Noises
Strange sounds (e.g., rattling, hissing, or grinding) can indicate mechanical issues, refrigerant leaks, or loose parts. Early detection can prevent major breakdowns.

How to Get the Best HVAC Prices
- Firstly, keep in mind that installation quality is always the most important thing for residential HVAC project. So never sacrifice contractor quality for a lower price.
- Secondly, remember to look up the latest rebates as we talked above.
- Thirdly, ask for at least 3 bids before you make the decision. You can click here to get 3 free estimates from your local contractors, and this estimate already takes rebates and tax credit into consideration and filter unqualified contractors automatically.
Lastly, once you chose the right contractor, remember to use the tactics from this guide: Homeowners Tactics When Negotiating with HVAC Dealer to get the final best price.